The task of installing the windscreen, while often dreaded, turned out to be more straightforward than expected. Here's a detailed walkthrough of my experience.
First, I grabbed the windscreen assembly and carefully slid the two rails into their slots on each side. I jiggled it a bit to align the front two bolts in the middle of the dash. Once they were aligned, I inserted and screwed in these two bolts, leaving about 1/4" of play.
Next, using the same plastic flat tool from Part 1, I slid the rubber seal into the correct position, flipping it over to seat on the car. With a flashlight inside the car, I inspected the holes to determine the best way to line them up. My plan was to attach the lower bolts on each side.
This part proved challenging. Instead of using a jig as suggested in various online guides, I asked a neighbor who was walking his dog to help. He pushed down on the driver’s side while I guided the direction with my left hand and screwed in the bolt with my right hand. After three attempts, I managed to screw in the first bolt. We then repeated this process on the passenger side, after which my neighbor continued on his walk. I did not tighten the bolts.
With the bottom two bolts in place, the windscreen moved like a lever. You can push or pull it to line up the holes. Surprisingly, I was able to screw in the top bolts easily past the dash edge, allowing me to continue with a wrench from the side. This was a part I had feared the most, but it turned out to be the easiest. Please note that in Part 1, I had put these bolts in many times and I also used a dab of anti-seize on the bolts.
If you get out of the MGB and close the door, you'll notice some play backward and forward. Align the windscreen with the door to ensure they mate perfectly, then tighten the bottom bolts. Do not overtighten. Repeat this process on the other side. Once these bolts are secure, tighten the top two bolts.
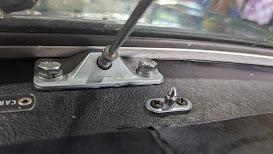
Finally, I inspected my seal, which looked fabulous! Below are some reference pictures, especially showing the way the rubber seal sits with the rubber foot and the location of these bolts. Feel free to click on any image to view it full size. The last thing to do is seal the corner areas using silicone as in John Twist's Video: 213 MG Tech | Sealing MG Windscreens.


